Welcome to Kyrna!
This quickstart guide will walk you through creating your first AI-generated infrastructure. You’ll go from zero to deployed infrastructure in under 5 minutes.1
2
Authorize with Github
Authorize with Github
- Click “Authorize with Github” in Kyrna
- Select Confirm and continue
-
Select your repository or create one
3
Create Your First Infrastructure
Using AI Generation
- Click “New Repository” in Kyrna
- Name your repo (e.g., “my-web-app”)
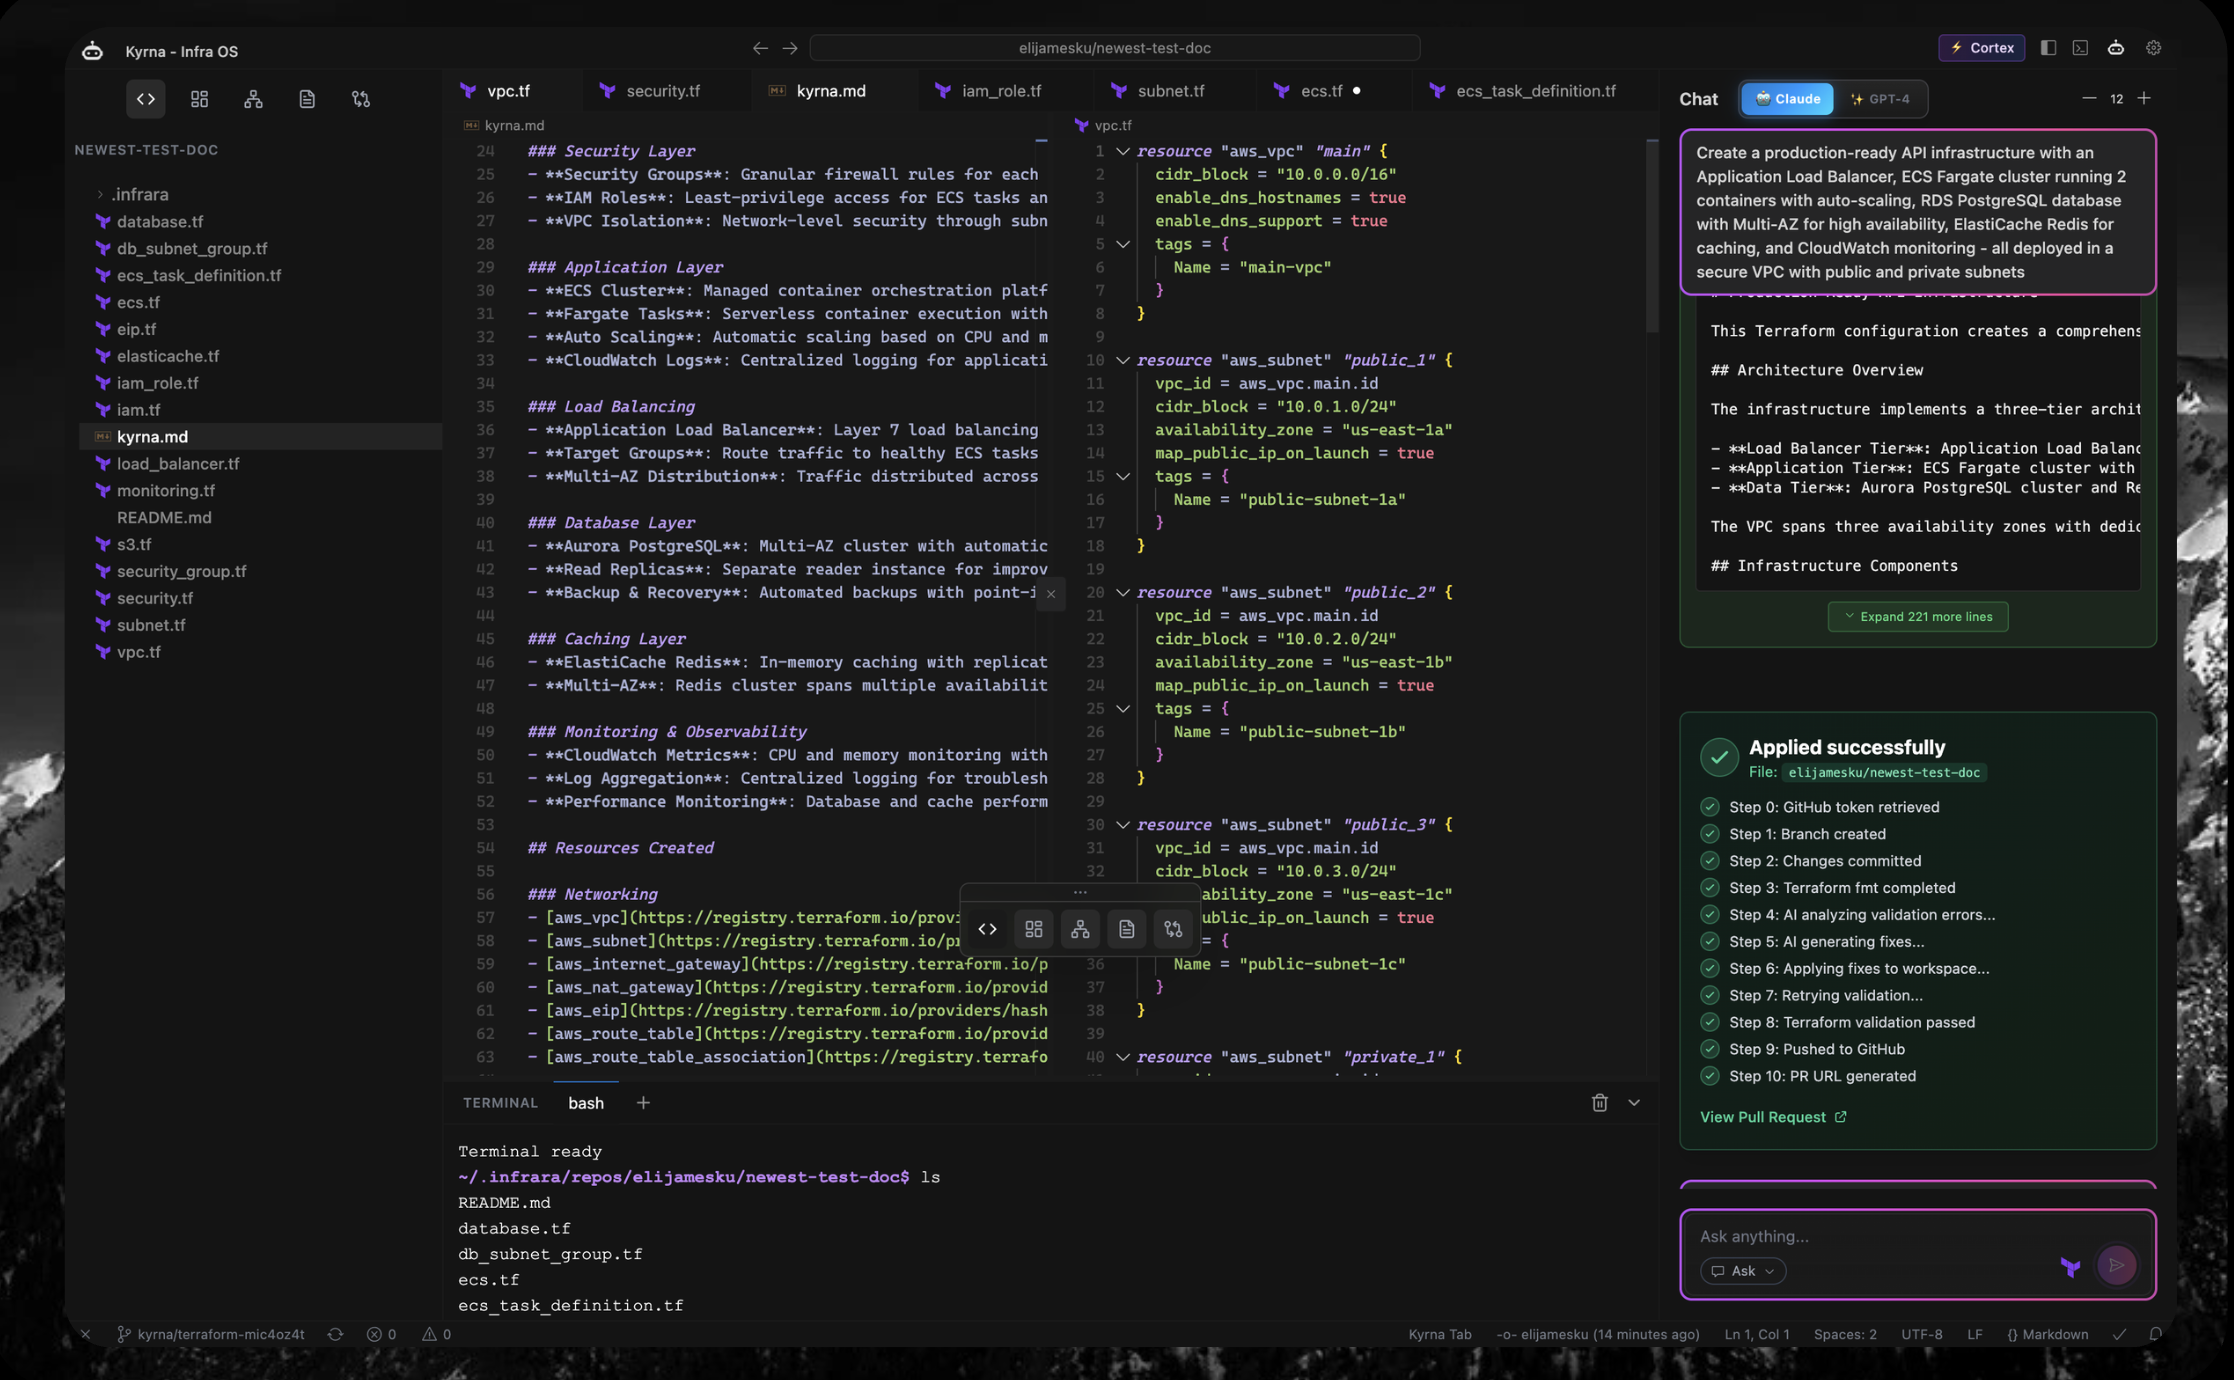
- In the AI prompt box, describe what you want:
- Press Cmd+Enter (Mac) or Ctrl+Enter (Windows/Linux)
- Watch as Kyrna generates your infrastructure code!
What You’ll See
Kyrna will show you:- Generated Terraform code with full resource definitions
- Real-time cost estimate (e.g., “$127/month”)
- Security scan results (any misconfigurations)
- Architecture diagram (visual representation)
4
Review & Customize
Review the Generated Code
The AI-generated code appears in the editor with:- Syntax highlighting for Terraform/HCL
- Inline cost annotations (hover over resources)
-
Security warnings (if any issues detected)

Make Adjustments
You can:- Edit the code directly in the editor
- Ask AI to modify (e.g., “change instance type to t3.large”)
- Add more resources using AI or manually
5
Deploy Your Infrastructure
Create PR
- Click “Create Pull Request” button or press Cmd+Shift+P
- Confirm the deployment
- Watch real-time progress in the chat panel
Deployment Complete!
Once deployed, Kyrna shows:- Deployed resources with IDs and IPs
- Updated architecture diagram with live resources
- Actual cost tracking (updates daily)
- Drift detection (monitors for changes)
What’s Next?
Congratulations! You’ve created your first AI-generated infrastructure. Here’s what to explore next:Master AI Prompts
Learn how to write effective prompts for complex infrastructure
Understand Costs
Deep dive into cost tracking and optimization
Security Best Practices
Configure security scanning and fix vulnerabilities
IDE Tips & Tricks
Master keyboard shortcuts and productivity features
Common First Projects
Here are some popular infrastructure patterns to try:Static Website on S3 + CloudFront
Static Website on S3 + CloudFront
AI Prompt
Containerized Application on ECS
Containerized Application on ECS
AI Prompt
Kubernetes Cluster on EKS
Kubernetes Cluster on EKS
AI Prompt
Serverless API with Lambda
Serverless API with Lambda
AI Prompt
Getting Help
Video Tutorials
Watch step-by-step video guides
Join Discord
Ask questions in our community
Contact Support
Email us for personalized help
Troubleshooting
AI generation is slow or not working
AI generation is slow or not working
- Check your internet connection
- Try simplifying your prompt
- Contact support if the issue persists
Github wont authenticate
Github wont authenticate
- Verify AWS CLI credentials:
aws sts get-caller-identity - Check IAM permissions (needs read-only access)
- Try re-authenticating in Settings → Cloud Accounts
Terraform validate failed
Terraform validate failed
- Check error message in terminal
- Verify AWS credentials have deployment permissions
- Ensure no resource naming conflicts
- Check for quota limits in your AWS account
Ready to dive deeper? Explore our AI Generation Guide or IDE Features!